
I spent almost two years working my way up to a full planche. While I didn’t ultimately make it, I did hit several milestones along the way, including the tuck planche and advanced tuck planche.
Below I have shared the workouts and resources that helped me most with each milestone.
Frog Stand
The frog stand is a simple starting point towards learning how to planche. It combines isometric strength and balance at a more entry level difficulty.
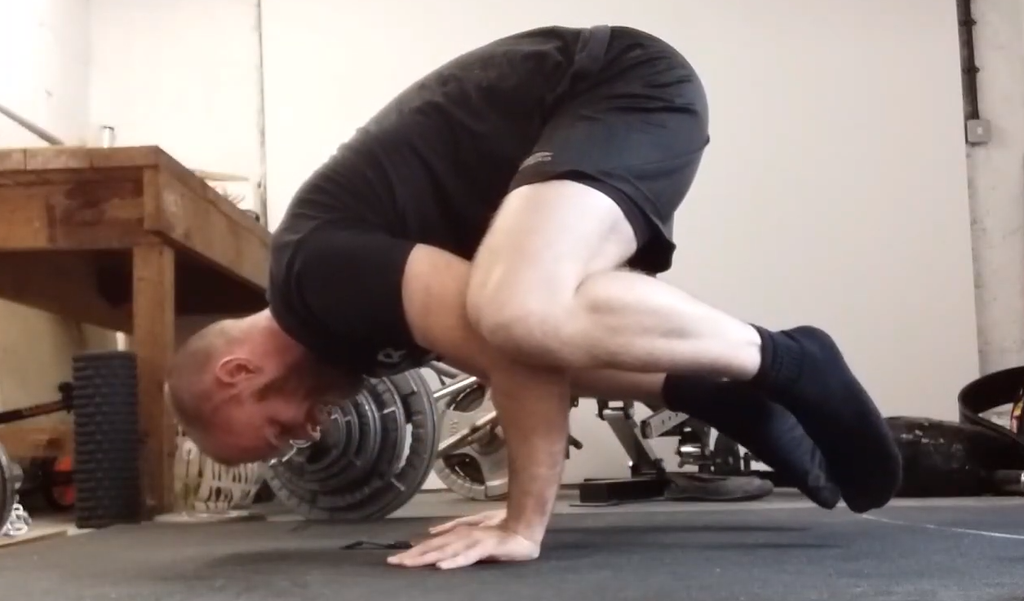
By training three times each week I was able to hold a 30 second frog stand after only 10 days.
Frog Stand Technique
- Place your hands on the ground, shoulder-width apart, with your fingers spread out
- With bent arms, place your elbows on the inside of your knees in a position that feels comfortable
- Create tension by twisting your hands away from each other (note: the hands do not actually move)
- Rock forwards so your toes are off the ground, and find your balance point
Pro Tip: Use the tension in your fingers to stop yourself falling forwards. Be careful not to rock too far backwards, as there’s no equivalent tension to stop you going back to your feet.
Key Exercises
- Planche Lean – 5 x 20 seconds: Start in a push up position, hands shoulder-width apart. Turn the fingers out slightly and have the inside of your elbows facing forward. Push the ground away, creating a rounded upper back. Lean the body forward so the shoulders are ahead of the wrists.
- The Frog Stand – 100-150 seconds total: It helps to practice the move you’re trying to master. I was focusing on the total amount of time I spent balancing within a session, rather than trying to hold for a certain length of time in each attempt.
- Core exercise – 3 to 5 sets: I found using either the L-Sit, Tucked L-Sit or Single Leg Front Plank to be useful exercises to finish my work out.
Advanced Frog Stand
I have a confession to make: the basic frog stand in no way prepares you for any of the other progressions in this article. I believe its included in a lot of tutorials to build initial confidence and give you exposure to balancing.
The key difference with all the progressions that follow is that now you require straight arms.
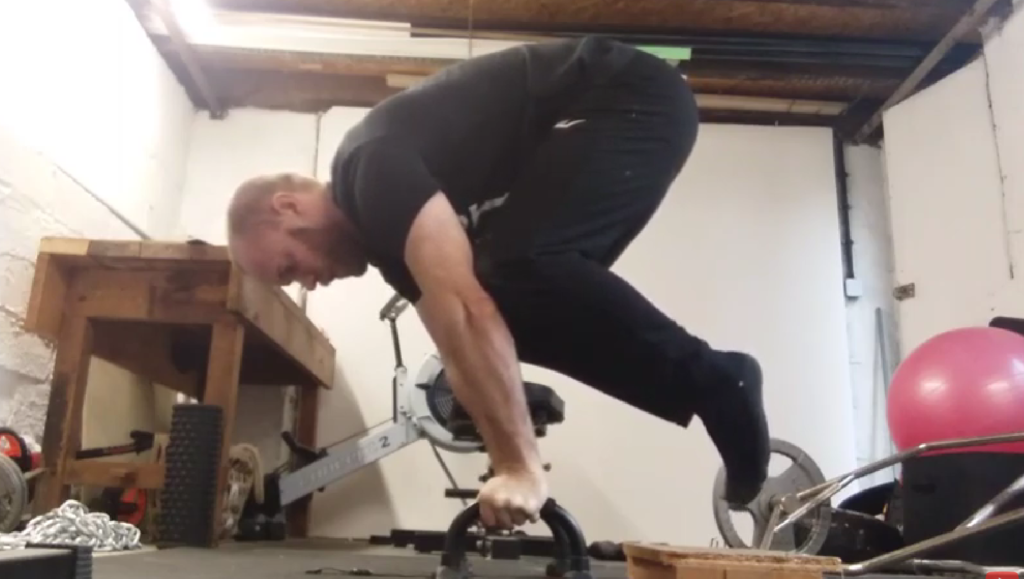
Having completed a 30 second frog stand, I could only hold the advanced frog stand for one second. However, it was only a further 11 days until I had a 30 second advanced frog stand.
Advanced Frog Stand Technique
- Place your hands on the ground, shoulder-width apart, with your fingers spread out
- With straight arms, place your knees on the back of the upper arm, slightly above the elbows, in a position that feels comfortable
- Create tension by twisting your hands away from each other (note: the hands do not actually move)
- Rock forwards so your toes are off the ground, and find your balance point
Key Exercises
- Planche Lean variations – 5 x 20 secs: Take the original planche lean and experiment with modifications that allow you to generate a bigger lean. This can be by raising the feet off the ground (on an exercise bench, chair or sofa) or by opening the legs (straddle)
- Advanced Frog Stand with support – 60 to 90 seconds total: To help build confidence, set up near a wall so that instead of falling forward, your head would rest against the wall. It’s also recommended to find a small platform for your feet and remain in contact throughout the hold. Try to rock forward from the toes until they are only just in contact, and hold there. This allows you to experience the tension of the position without worrying about balance.
- Core exercise – 3 to 5 sets: I found using either the L-Sit, Hanging Leg Raise, Tucked L-Sit or TRX Tucks to be useful exercises to finish my work out.
Tuck Planche
The next progression from advanced frog stand is to remove the knee support and hold a tuck planche.
One of the breakthroughs for me was extending my rest periods when practicing the tuck planche, with a minimum of 2.5 minutes between efforts. Otherwise it involved a lot more trial and error, and I probably spent too long on exercises that showed no real progression for me.
It ended up taking me around five months to hold a 20 second tuck planche, but if I’d followed the protocol below it could have been achieved in 10 to 12 weeks.
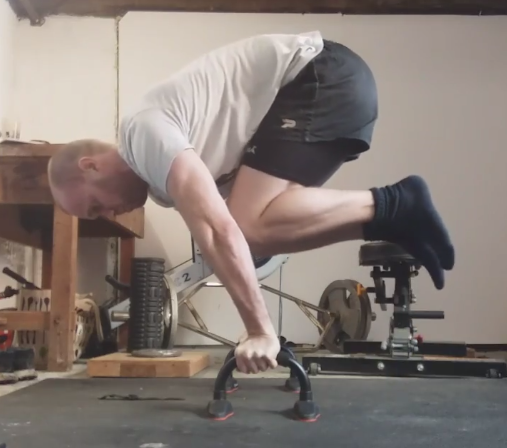
Tuck Planche Technique
- Place your hands on the ground, shoulder-width apart, with your fingers spread out
- With straight arms, bring the hips into a high position, adopting a forward lean with the arms
- Tuck one knee in tight to the body, and once you’ve found a balance point, bring the remaining leg up to meet it
Key Exercises
- Pseudo Planche Push Up – 2 to 3 sets (not to failure): Effectively setting up like a planche lean, and then doing push ups from that position, so that your hands are level with your belly button or lower in the bottom position. Ensure you are fully warmed up before this exercise.
- Tuck Planche Pulses – 3 to 5 sets: From a Tucked L-Sit position, transition into a tucked planche, holding briefly before returning back again. This is more of a balance skill so you can do multiple sets.
- Tuck Planche – 80 to 90 seconds total: common technical points are holding a high hip position and actively pulling the knees into the chest. If necessary, try this move while still remaining in light contact with the floor with your toes, in order to build up time under tension.
- Bent Arm Tuck Planche – 5 x 20 seconds: This is great practice for the lower body, and you allow yourself to have a 90 degree bend in the arms, which replicates the forward body position of a planche. Focus on the high hip and tucked knee cues from the regular tuck planche.
- Core exercise – 3 to 5 sets: During this progression I used an L-sit, sometimes with an object I needed to hold my feet over, Tucked L-Sit and Hollow Body Hold.
Advanced Tuck Planche
The advanced tuck planche was as far as I managed to progress. This involves holding a lower shin position, parallel to the floor.
I found this progression frustrating to train and needed a further 9 months after the tuck planche to manage a 14 second hold. However, by the end I found a nice program layout which I felt was worth sharing.
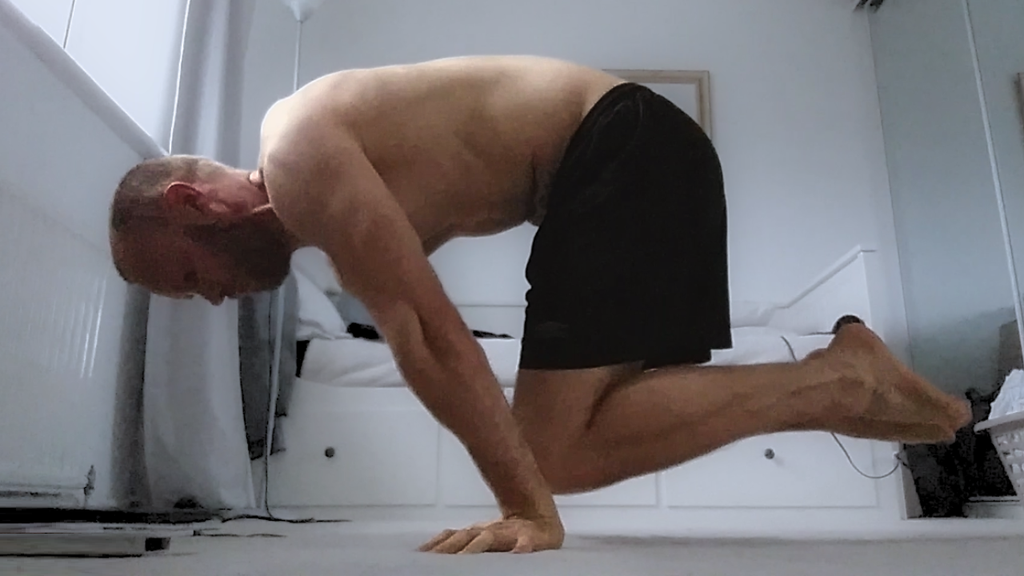
It’s important to remember the idea behind all these progressions: to allow more forward lean of the arms in preparation for the full planche.
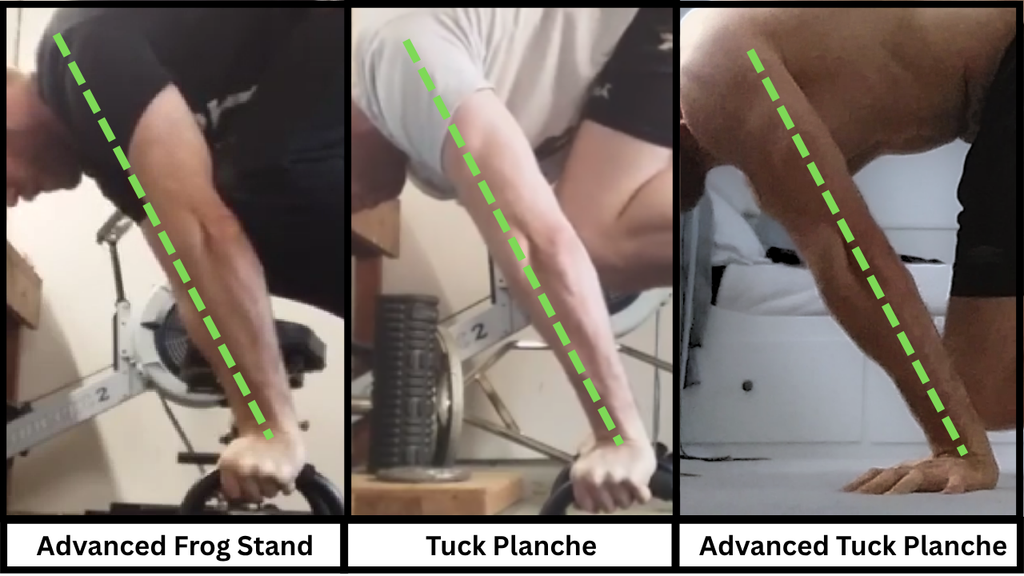
In the below image, I’ve superimposed a line at the same angle as my tuck planche. You can hopefully see the advanced frog stand (left) isn’t as steep, while the advanced tuck (right) has a steeper arm angle.
Advanced Tuck Planche Technique
- Place your hands on the ground, shoulder-width apart, with your fingers spread out
- With straight arms and knees together on the ground, round the upper back and create tension in the arms
- Knees together, tuck the pelvis under and squeeze the glutes into a posterior tilt.
- Lean forward into the balance point, ensuring the knees have a 90 degree bend and stay behind the hands
Key Exercises
- L-Sit to Straddle Pulse – 4 sets of 4: Starting in an L-Sit, bring the legs in to a tucked position and use the momentum to shoot the legs out backwards into a very brief straddle before returning to the tucked L-sit. Be sure to warm up the groin prior to this as it can be quite a jerking movement for the legs!
- Pseudo Planche Push Up – 2 to 3 sets (not to failure): Staring in a planche lean, complete push ups from that position, with your hands level with your waistline in the bottom position. Ensure you are fully warmed up before this exercise.
- Tuck Planche Push Up – 5 sets: Using parallettes, start in a bent arm tuck planche and extend the arms into a tuck planche before lowering again.
- Advanced Tuck Planche – 50 seconds total: Accumulate sets around 50-70% of the duration of your best hold. Due to the intensity of straight arm training, it’s recommended to only train it every five days.
- Core exercise – 3 to 5 sets: The main core exercises were a raised L-Sit (feet held above an object) and hanging leg raises, bringing toes to bar.
Additionally, I was following workouts by Osvaldo Lugones who has some excellent videos on his YouTube channel. My full 14 month training log can also be seen here.
Thanks for reading and good luck in your planche journey!
