

Your vertical jump is the maximum height you can jump off the ground. It is a good way to assess your lower body power relative to your body-weight. The only equipment you need is a tape measure and the ability to make a mark on a wall.
How To Measure Your Vertical Jump
There are two common protocols for measuring your vertical jump – standing or with a run up. For this test we will be doing a standing vertical jump. The specific type of jump required is a countermovement jump, where the person crouches down from a standing position and then explodes up into the air.
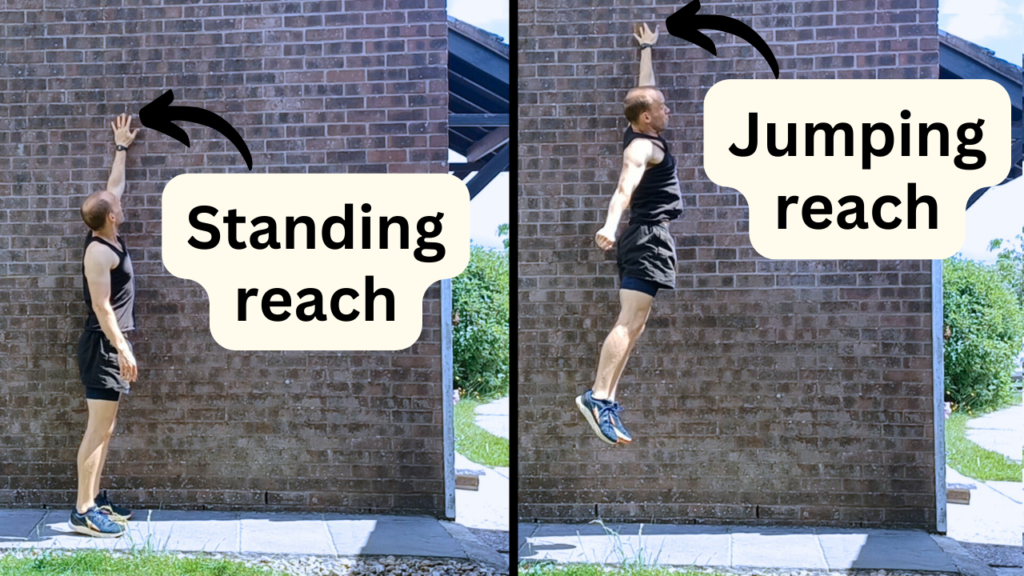
The person will first stand upright and reach with a single arm as high as they can, keeping the heels on the ground. Their first mark will be the maximum height reached, often known as someone’s “standing reach”.
They will then make a second mark on the wall at the highest point of their jump, which I will call the “jumping reach” (see below). This is often done with chalk, but there are also specialised pieces of equipment to measure your jumps.
A person’s vertical jump height is the distance between their standing reach and their jumping reach.
Vertec
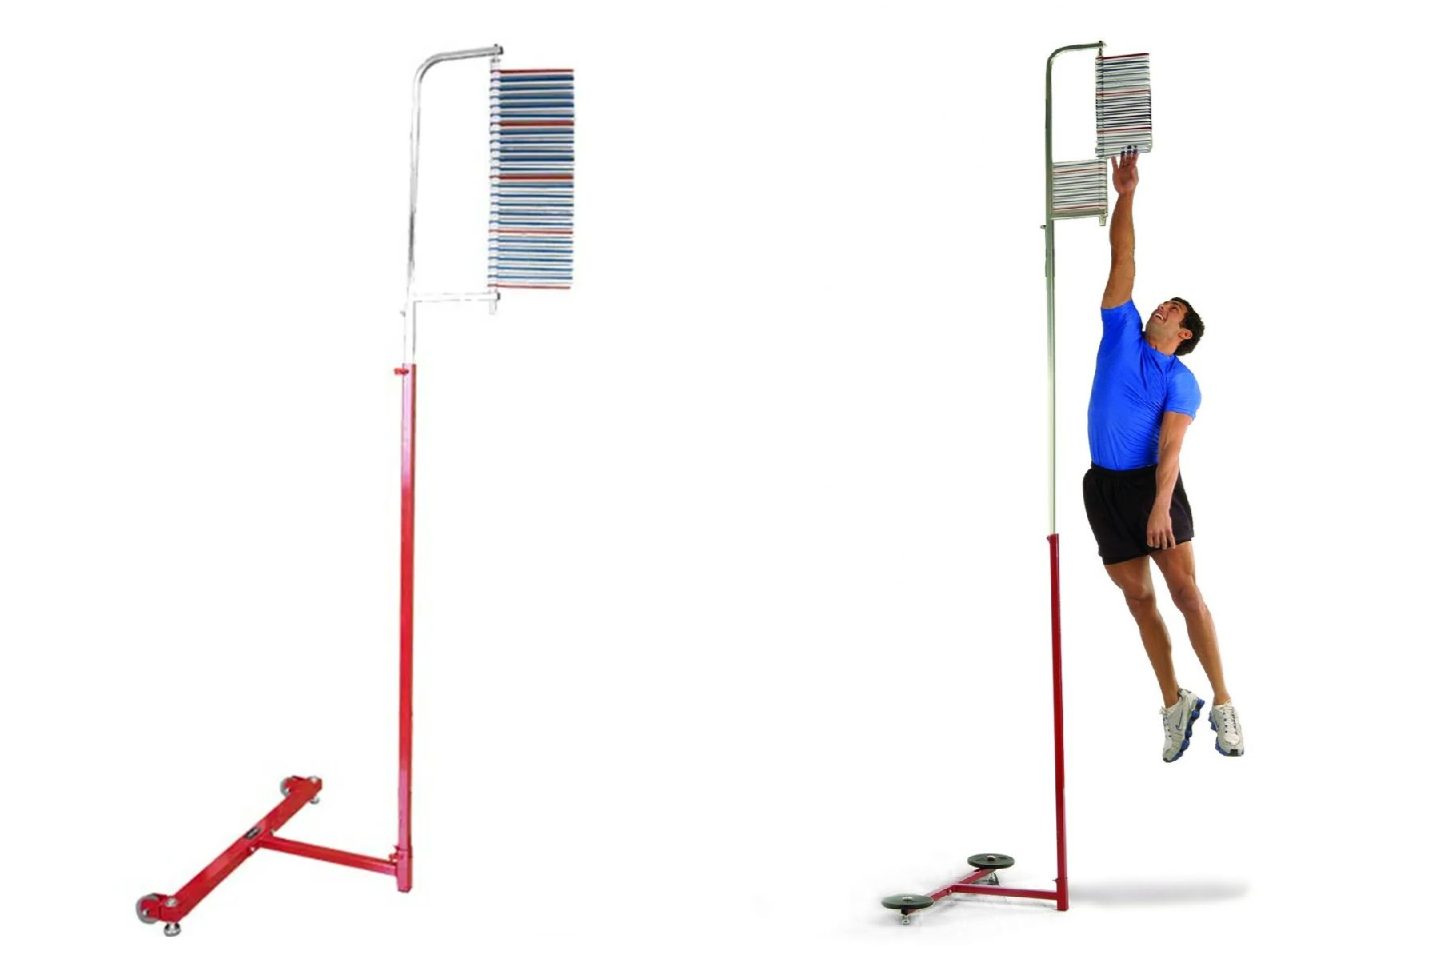
The first piece of specialised equipment is called a Vertec. This is a metal stand with a series of horizontal bars at increasing height. The height is adjusted so that the athletes standing reach is the same height as the lowest horizontal bar. The athlete will then complete a vertical jump, attempting to touch the highest horizontal bar they can. As the bars are attached loosely on one side, they will move, allowing you to see how high you managed to jump.
Tip to Tip
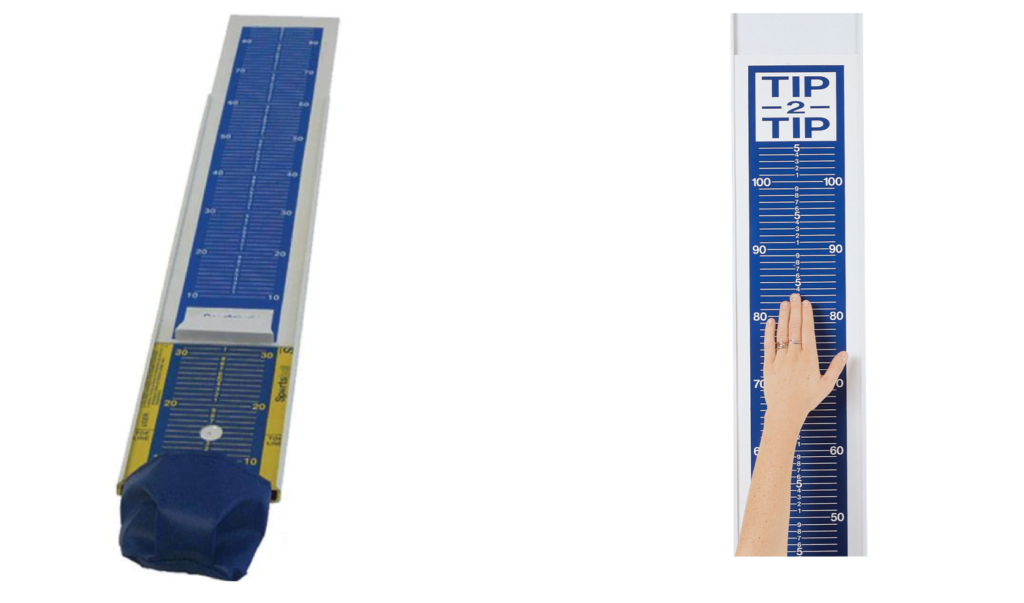
You may also be familiar with the wall mounted Tip to Tip, which allows you to directly measure jump height from a chalk mark. Equipment like this is often found in gymnasiums and schools as it’s useful for testing many subjects quickly.
The person first reaches up from a standing position and slides the blue panel, which will then stay in place when it’s released. The blue panel has a metre ruler printed on it, so by sliding the panel you’re effectively setting the ruler to your standing reach. The vertical jump is then executed, and at the high point the user will touch the blue panel. They can either chalk their fingertips prior to the jump, therefore leaving a mark, or rely on a second person to observe what height was touched on the ruler.
Jump Mats
Jump mats are the most high tech solution for measuring jump height. There are sensors in the mat which can tell when someone is in contact with it, and it works by measuring the time you spend in the air. As the instant you leave the ground you are subject to the force of gravity, it’s possible to know someone’s jump height from the time they spend off the ground. For accuracy, users are encouraged to land with relatively straight legs.

Chalk Only
The most basic version of a vertical jump test can be done with a wall and a piece of chalk. For this protocol, the person first chalks their fingertips and reaches up with one arm to make a mark on the wall at the height of their standing reach. They will then reapply chalk and execute a vertical jump, touching the wall at the highest point in order to make a second mark. With the use of a metre ruler or a measuring tape and a ladder, they can then measure the distance between the two chalk marks. This represents their vertical jump.

Warming up
As this is an explosive movement, it’s recommended that you complete a thorough warm up prior to the test. I have recorded an 8 minute dynamic warm up that can be seen below.
It can help as part of the warm up to do a few practice jumps at 80-90% effort to get a feel for the best technique. This also serves to reduce the risk of injury as you are building up the intensity gradually. Additionally, it gives you a chance to coordinate the movement and learn to touch the wall at the highest point.
What Do My Results Mean?
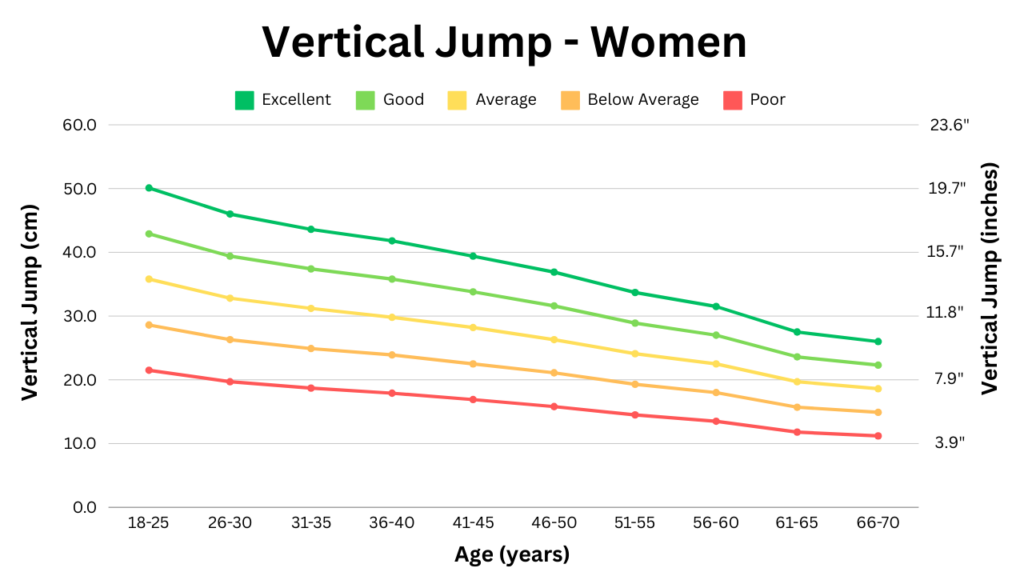
The vertical jump standards below were created from a combination of normative data sources. Sources tend to either report average values by age or standards for a single age group. I’ve had to extrapolate, based on the assumption that the percentage difference between “Good” and “Poor” efforts is maintained across all age groups.

The most obvious difference between the two charts is that, on average, men jump 10-20cm higher. Elite male athletes are capable of jumping upwards of 100cm (~40 inches). As this graph is for the general population, anything above 70cm (~28 inches) here is considered “Excellent”. Muscle strength and power are lost at a faster rate than muscle mass with age, equivalent to ~1% per year.
Tracking over time
While I wouldn’t consider this an essential test, it’s perfectly reasonable to assess yourself every year and track your progress. Alternatively, measuring every 3 to 5 years will allow you to measure your loss of power with age.
There is a skill element to a vertical jump, both in the overall execution and timing it so your mark is made at your highest point. With that in mind, you may find the difference across 3 years of testing to be the same as what you might see from consecutive jumps. If that’s the case, you may wish to have multiple attempts and take your best effort, rather than relying on a single jump.